ソウルオブカオス特化ビルド
ジョブ1:輪廻の戦士
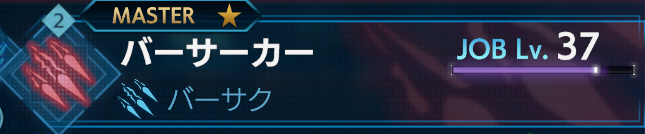
ジョブ2:バーサーカー(自由枠)
ジョブ適性
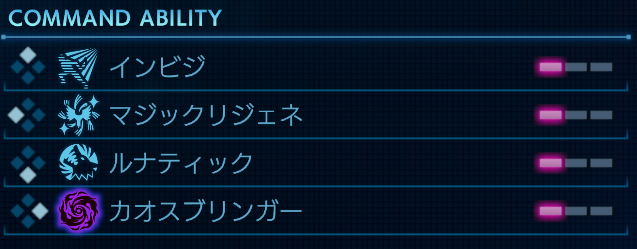
コマンドアビリティ
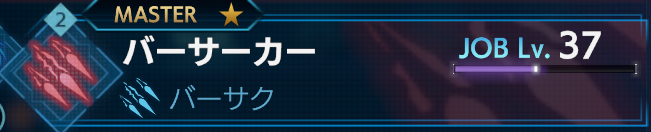
マスターポイント
カテゴリー①
カテゴリー②
カテゴリー③
カテゴリー④
解説/立ち回り
暗黒騎士のラストリゾートによる常時瀕死時与ダメージ上昇と輪廻の戦士のソウルオブカオスの高威力魔法(属性)ビルドです。
必須のジョブ適性は暗黒騎士400%、輪廻の戦士250%です。
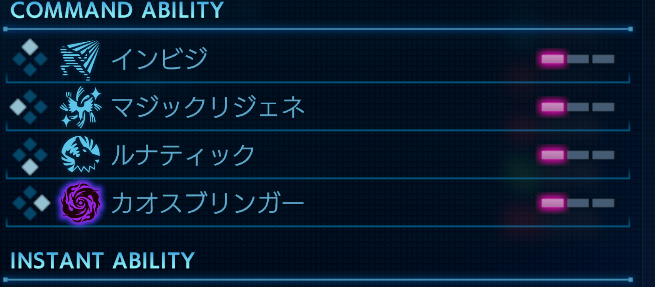
コマンドアビリティは『カオスブリンガー』『ルナティック』『マジックリジェネ』『インビジ』固定です。 聖なる刻印は無しでも特に問題ないのでお好みで。
基本的な戦い方として、開幕『カオスブリンガー』→コマンドアビリティ3種+余裕があればバーサクです。
特に『ルナティック』の攻撃速度上昇はソウルオブカオスにも乗るので発動速度が段違いです。
後は上記バフが切れないように管理し、『つなみ』で遠距離から攻めて、状況に応じて性能の違う属性を使います。
注意しなければならないのは一度ダウンしてしまうとMP上限が下がったままで復帰後に何もできなくなるので、敵の行動はよく見ておきましょう。
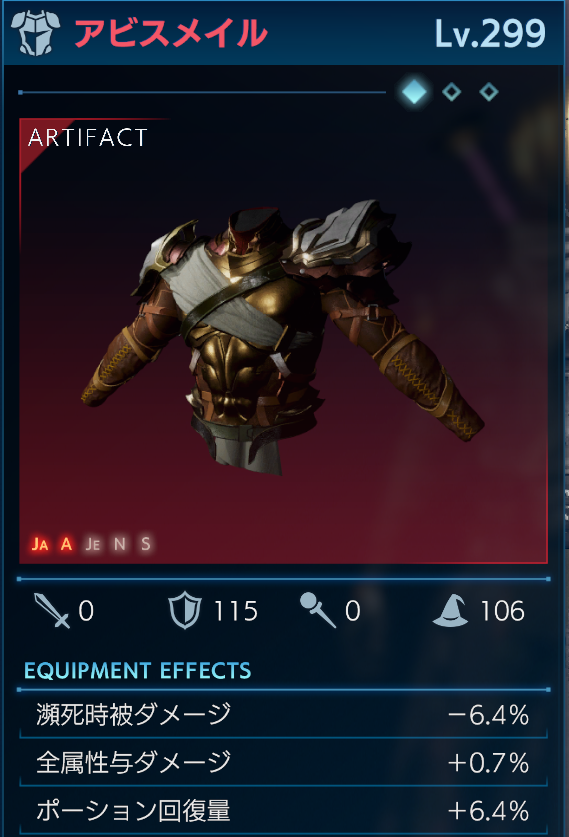
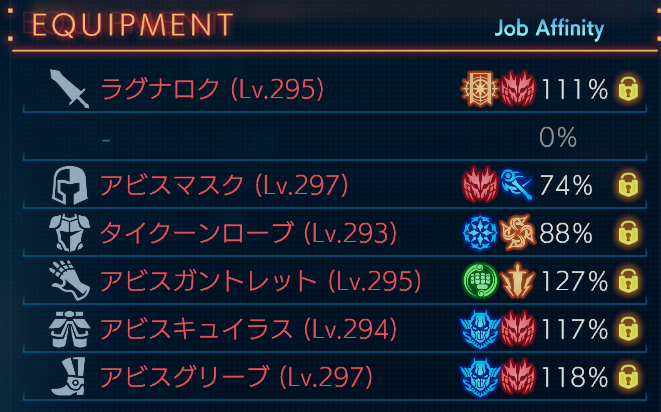
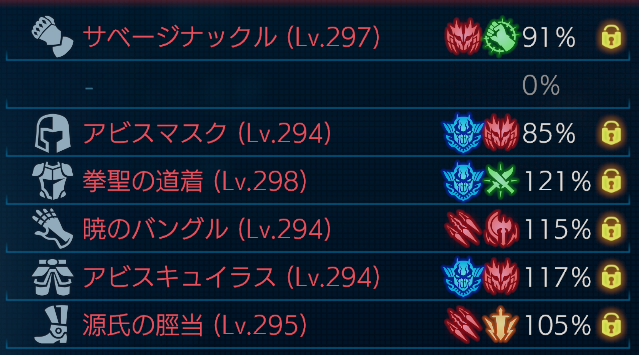
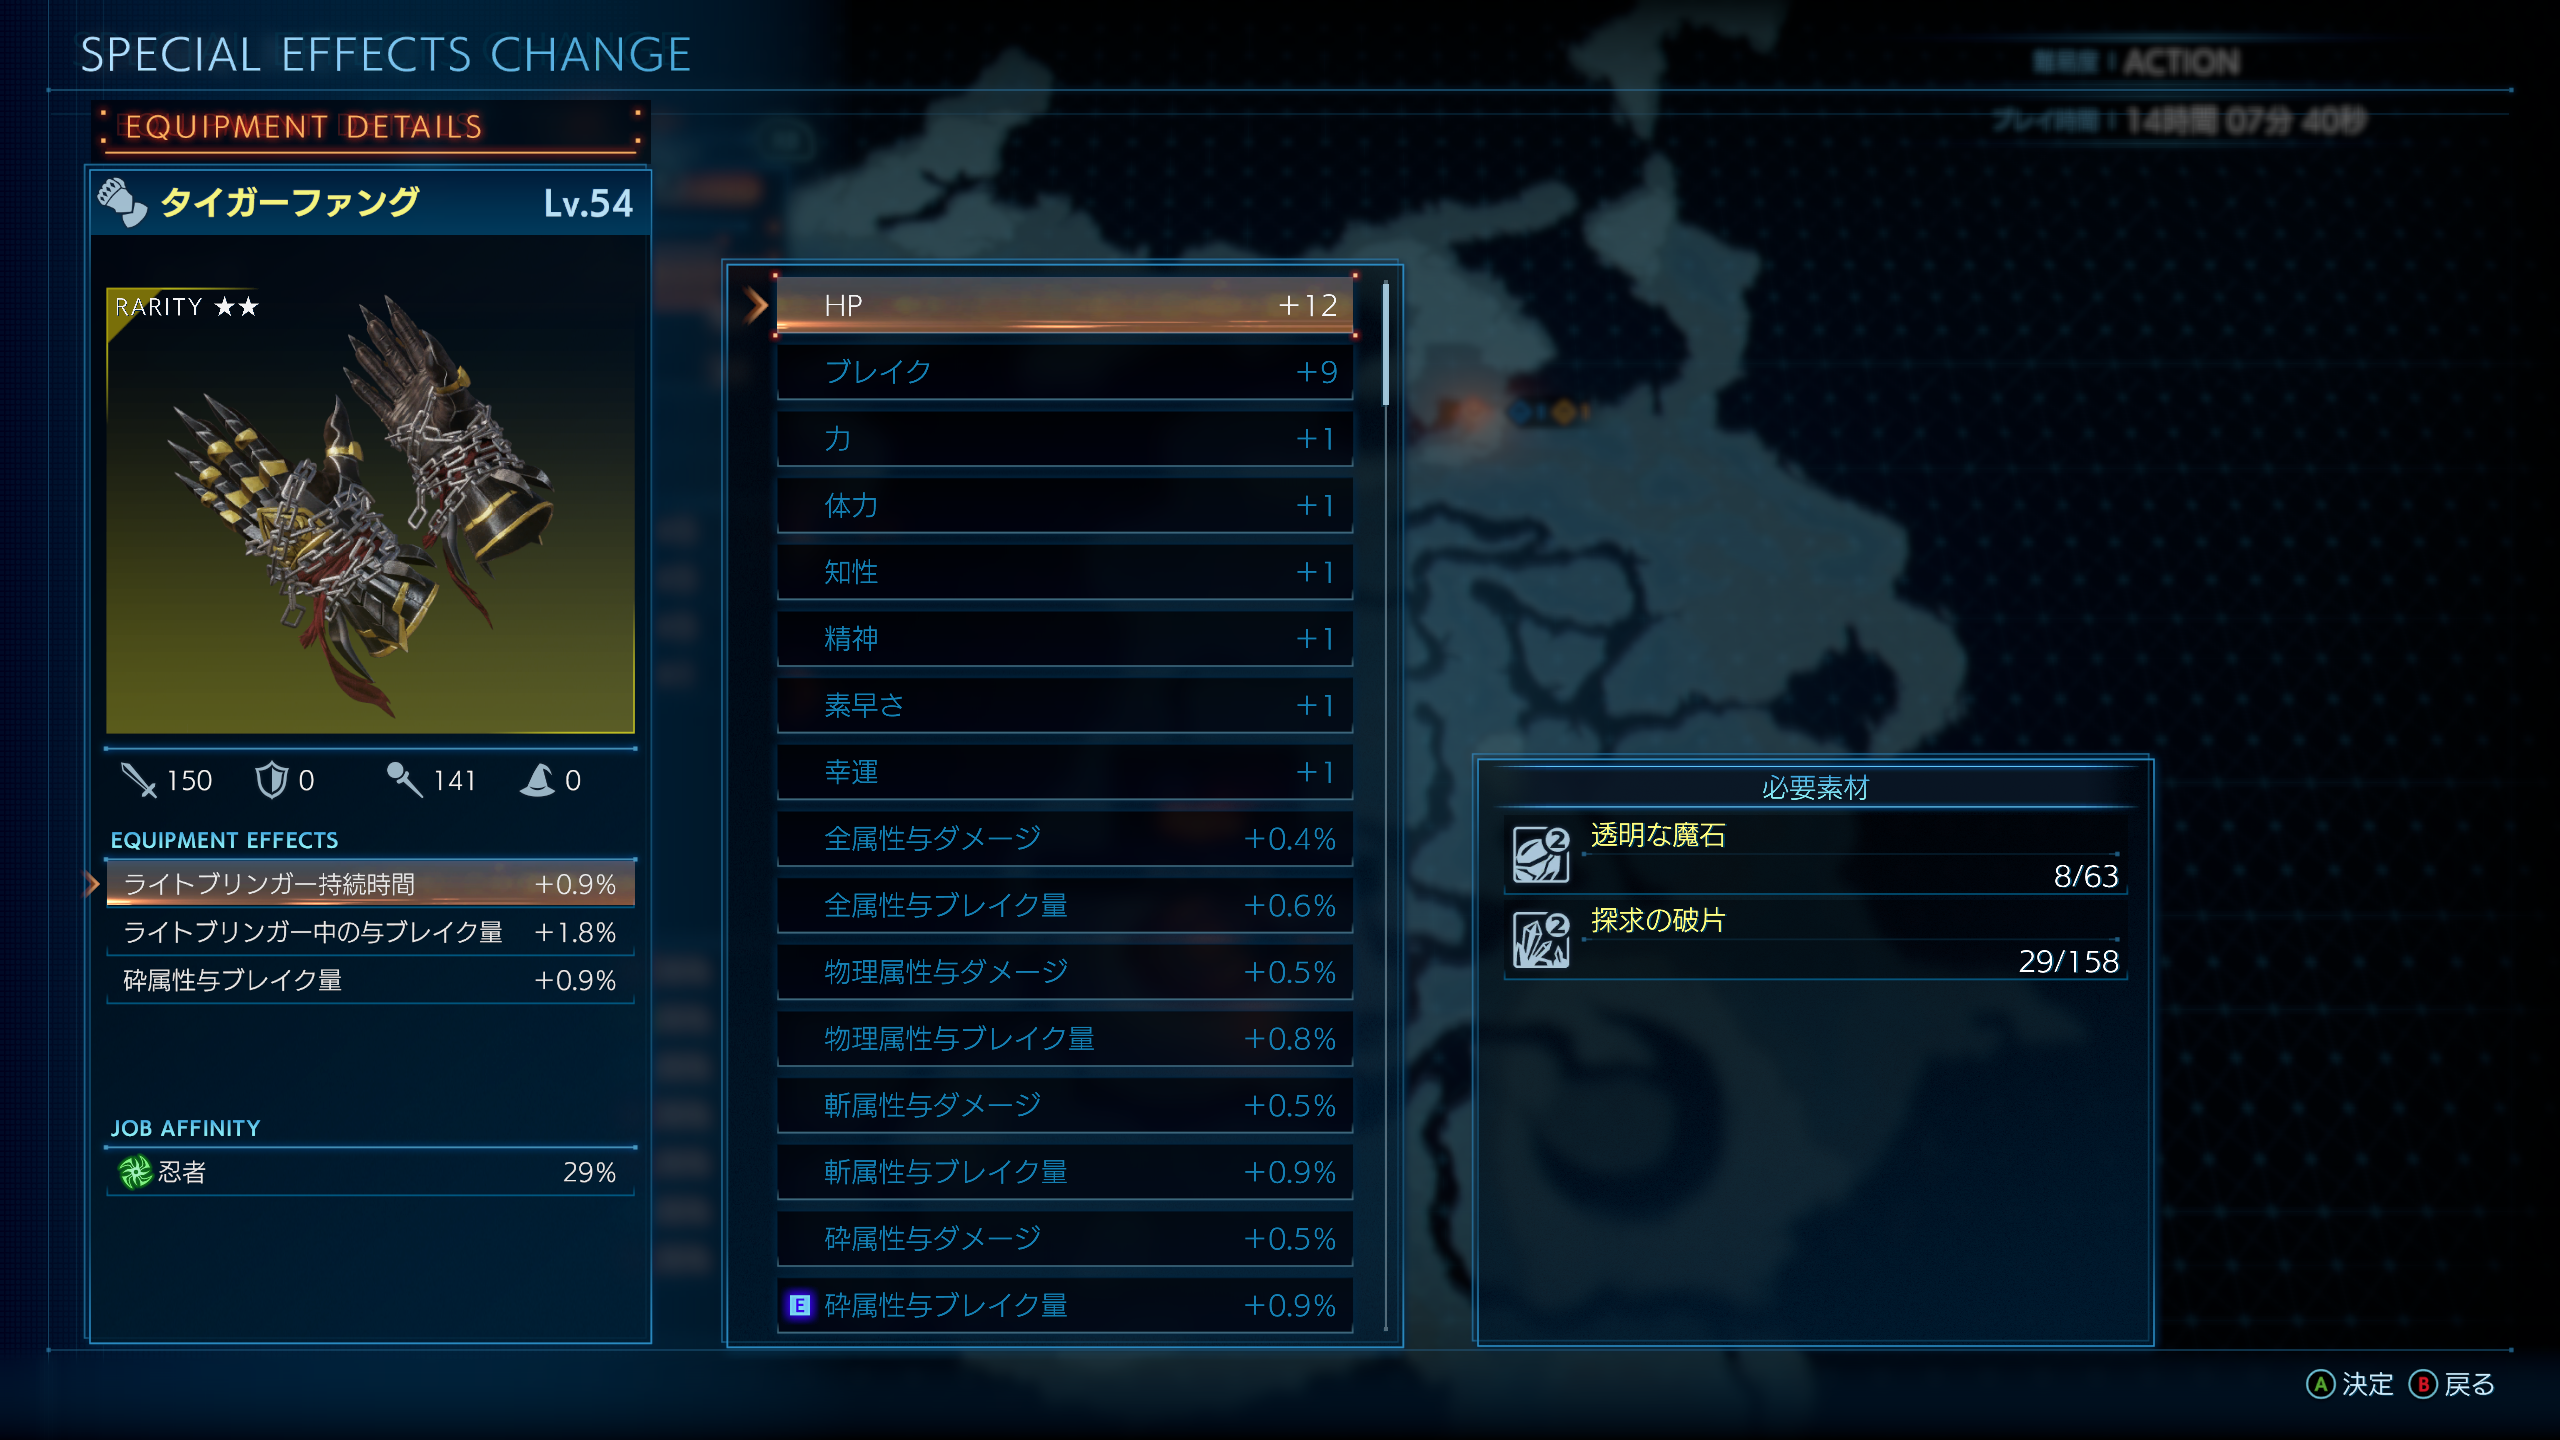
余談ですが、防具の『アビスマスク』『アビスガントレット』『アビスキュイラス』には『瀕死時与ダメージ+』のOPがついています。

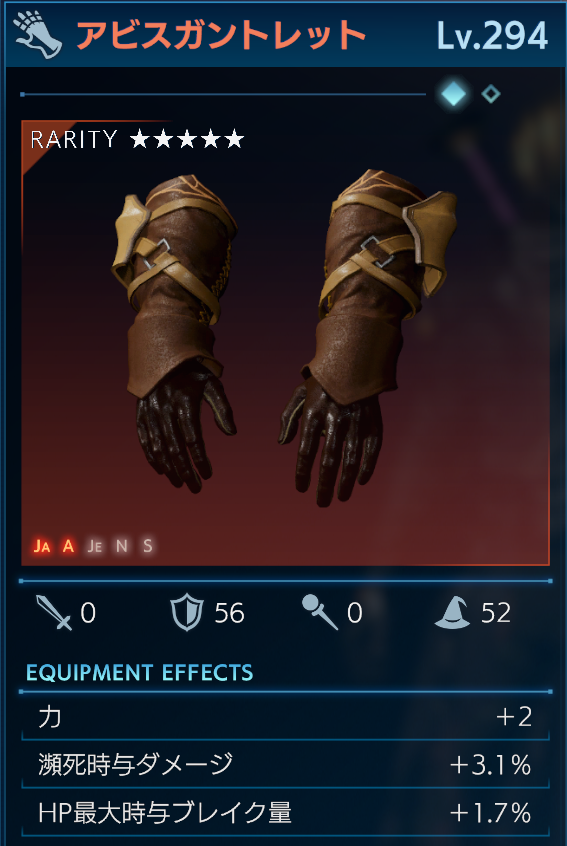
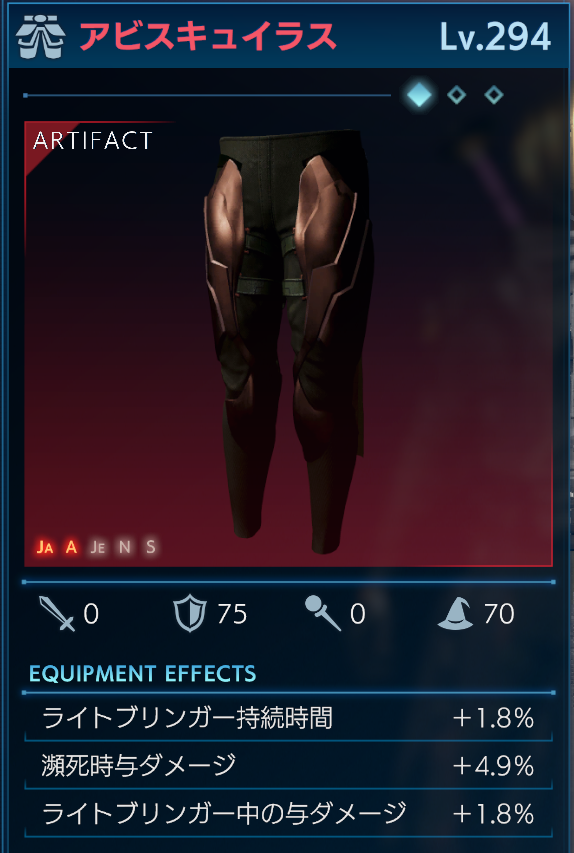
これは鍛冶屋のOP一覧にはないもので、この防具が持つ固有のOPとなっているようです。 ちなみにアビスの胴と足は『瀕死時与ダメージ+』はついていないっぽいので省いています。
また『カオスブリンガー』についてですが、扱いとしては『ライトブリンガー』と同じらしく、ライトブリンガー系のOPが適用されます。(輪廻の戦士のジョブ適性400%の神罰など) つまり、ソウルオブカオスのダメージを底上げする為にカオスブリンガーを使い、『ライトブリンガー中の与ダメージ+』や『ライトブリンガー持続時間+』を発動させることができるということです。
3/22現在の瀕死時与ダメ+の合計と装備がこんな感じです。
フレア・メテオ特化ビルド
ジョブ1:黒魔道士
ジョブ2:バーサーカー
ジョブ適性
コマンドアビリティ
マスターポイント
カテゴリー①
カテゴリー②
カテゴリー③
カテゴリー④
解説/立ち回り
本来ならMP上限を消費して使うフレア、メテオをカオスブリンガーで連発するビルドです。 必須ジョブ適性は赤魔道士250%、輪廻の戦士250%で黒魔道士は400%無くてもいいかもしれません。
個人的にはカオスブリンガーで下がったMP上限を無理やり引き上げることができるので継戦能力が高くなるかなと。
立ち回りとしてはソウルオブカオスと同じく、カオスブリンガー中にコマンドアビリティ3種を切らさないようにしつつ、余裕があればバーサーカーに切り替えてバーサクを使ってメテオ、フレアを撃つ作業です。
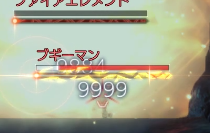
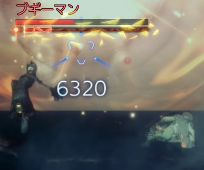
ちなみにバーサクの攻撃力増加のバフは魔法にもしっかり乗る上にジョブを切り替えても発動しているので↓のようなダメージがでます。(フレア)
その他にもソウルオブカオスビルドの応用もできます。
ラストリゾート瀕死ビルドでも十分に強いです。
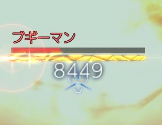
バーサクとマスターポイントの瀕死与ダメ無しでこの威力(フレア)
回復・バッファーであれば
これで無限に蘇生と回復とバフが使えて、ホーリーで敵を焼き尽くす歌って踊れる白魔道士が出来上がります。
マルチで真価を発揮すると思います。
あと、自分の勘違いだったら申し訳ないのですが、マスターポイントの割り振りはプリセットに登録できないみたいなので、使うたびに振りなおさないといけないです。(なんでだよ)
魔封剣ガン盾ビルド
ジョブ1:ヴォイドナイト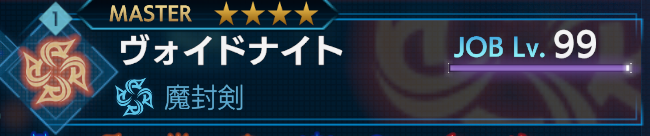
ジョブ2:白魔道士
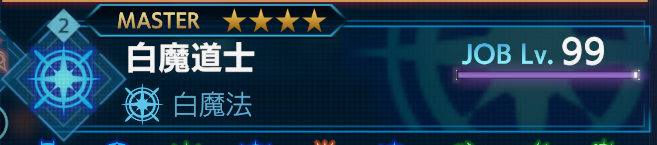
ジョブ適性
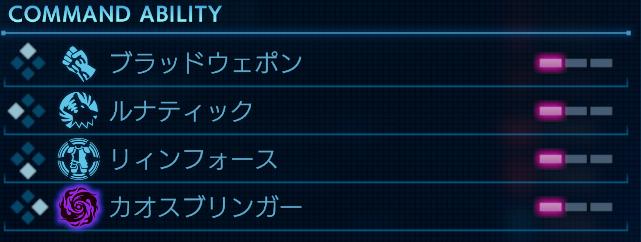
コマンドアビリティ

マスターポイント
カテゴリー①
カテゴリー②
カテゴリー③
カテゴリー④
解説/立ち回り
魔封剣で攻撃を防ぎつつ攻撃するタンク的なビルドです。
必須ジョブ適性はヴォイドナイト250%、パラディン250%くらいですかね。
筆者はMPの燃費が気になるので輪廻の戦士250%でより長く魔封剣を維持できるようにし、カオスブリンガーでリジェネ効果も発動させ回復しつつ攻撃を受け、隙を見て魔封剣を使うといったやり方をしています。
コマンドアビリティはソロならセンチネルか挑発、マルチなら挑発でタゲを持ち攻撃を受けます。
裏に白魔道士もあるので、PTの支援にも使えます。
魔封剣のチャージは自然に溜まりますが、魔法なら更に加速します。
誤解しそうなのが物理は防げないなんてことはなく、しっかり防御できます。(ブレイクは減りますが)
欠点として発動中はMPが減り続けることと、掴みなどの防御不可攻撃を高頻度で連発してくる敵に対してかなり弱いです。
それ以外だと割と硬い盾として機能するので、タンクビルドの気分転換に丁度いいのかなと思います。
ドレインナックルビルド
ジョブ1:暗黒騎士
ジョブ2:バーサーカー

ジョブ適性
コマンドアビリティ
マスターポイント
カテゴリー①
カテゴリー②
カテゴリー③
カテゴリー④
解説/立ち回り
ナーフ筆頭候補くさい皆さんご存じのビルドですね。
必須ジョブ適性は暗黒騎士400%、バーサーカー250%です。
あとは好みでダメージか防御系にすればいいと思います。
筆者はMP管理してバフ使うのが面倒なので輪廻の戦士250%のカオスブリンガーでバフを使うようにしています。
ナックルの通常攻撃が砕属性なので格闘士で与ブレイク、手数が多く背面も取る機会があるので短剣士でクリティカル、大剣士で攻撃中の被ダメ軽減、斧士の溜め攻撃与ブレイクなど腐るところがない構成となっています。
戦い方は至ってシンプルで、暗黒とカオスブリンガーでコマンドアビリティ3種を使い(余裕があればバーサクも)、後は通常攻撃を連打しつつ2スタックで溜め攻撃を織り交ぜていく。
注意しなければならないのは防御不可攻撃とブレイクゲージが割れて全バフが無くなるとかなり苦しいことです。
それ以外は文字通り殴っているだけでほとんどの敵を倒せます。
★5や★4でビルド作るのは完成形だとは思っていないので、AFで揃えるの大変だったよ…。
コメント